Saturday, April 30, 2011

Sewing Class #18

I was so glad to go to sewing class today.  I had to miss Wednesday because of parent-teacher conferences.  I made this adorable kids jacket.  It's not quite done.  I think it looks a little plain.  I'm thinking I may add a patch and some decorative stitching.  I LOVE the bear toggle clasp.  I think it's too cute!


Monday, April 25, 2011

More Sewing for Japan

I sewed up 6 more pencil cases today for the auction.  These are such a great way to use up scraps!


I had advanced sewing club today (grades 3-6) and showed them all the projects from this weekend.  Their enthusiasm really motivates me.  They really liked the Nintendo DS pouches.  Even though they were tedious to make, I may have to sew a few more tomorrow.  The girls were pretty sure they would sell.  I'll post more pics tomorrow.

Sunday, April 24, 2011

Sewing for Japan

My school is holding a silent auction this week for Japan.  I have been busy sewing away this weekend to contribute some items.  I ended up sewing...2 tote bags, 6 drawstring pouches, 3 zipper pouches, 4 Nintendo DS cases, 1 apron, and 1 pencil case.  I still have a couple more pencil cases and one more adult apron to go.  I hope the items bring in a good amount of money to send to our neighbors!

Sewing Class #16 and #17

It took 2 classes to finish this bag.  I did all the cutting on Friday and all the sewing on Saturday.  I haven't put the handles on it yet because they are on order.  I needed handles that had a fabric strap and a leather base.  This bag is going to live in a place that gets very cold.  Sometimes leather straps crack in extreme cold.


Wednesday, April 20, 2011

Sewing Class #15

I FINALLY made it to the "Boston Bag."  I have been waiting months to make this bag.  It is wonderful, and not as hard as I thought it would be.  I think it would be a lot easier if I didn't do the piping and bias (inside).  I actually made the piping for the outside.  It wasn't hard at all.  It's so nice to have someone show me how to do everything, that way, when I get confused, I can ask questions.  I still have to add the handles.  I will do that tomorrow and add the pic.  I will definitely be making another one of these!


Fabric Box

No, your eyes are not deceiving you, it is a Halloween box.  While I was search for a checkbook cover tutorial I came across this fabric box tutorial on paygelyra's blog.  It was so easy to follow.  The only thing I did differently is that I quilted the sides, bottom, and pocket of the box.  I used Halloween fabric to test it out before I used my good fabric.  I really love the way it turned out.  It came out bigger than I thought (each side is 8 in.)  I think the next one I make is going to be 6x6 in.

Sunday, April 17, 2011

Sewing Class #13 and #14

I started this big bag on Friday, and continued it on Saturday.  I sewed some bias on the inside, but decided to rip it out because it didn't look very neat.  I still need to hand sew the bias and add the handles, but I really like the bag.  I have some extra fabric that I think I'll use for either a matching pouch or wallet.


Travel Document Holder

So I was talking with my sister last week about how I've been making so many bags I don't know what to do with them all.  She suggested I make some things with more detail.  So, I thought "What can I make that I know I'll use?"  I decided to make a travel document holder.  It took me all weekend, but I'm so happy with the way it turned out.

 Front

 Back

Inside
It has a pocket for the boarding passes, my passport, some credit cards and IDs, and a pen holder.  I'm set for my next flight!!

Thursday, April 14, 2011

Wallet Complete!

I spent about 2 hours finishing up the wallet tonight.  I think it's cute, but I like making bags better.  LOL.  I think I need to keep practicing my bias skills.  The inside is a mess.  Here are some photos of the finished piece.


Travel Bag Complete!!

I finally finished my travel bag.  I think it's about as big as my rolling suitcase.  LOL.  I love it and can't wait to use it this summer.

 With the drawstring top closed. (I need a better picture of the quilting I did on the bag.)

 If I want to leave it open, the drawstring flap just sits inside.

 Inside Pockets

Side View

Sewing Class #12

Ok, so my comment about the advanced sewing class not feeling "advanced" enough, I soooooo retract that statement.  I started this wallet yesterday.  It took a little over 2 hours to get this far.  I think my teacher had me sew the bias on the wrong side because when I was finished, she looked a little panicked and told me I should rip it out and hand stitch it the other way.  I'm going to sew the bias tonight and will add new pics when it is all done.

 Outside

Inside

Sunday, April 10, 2011

Travel Bag Progress

Here is a picture of the bag a started yesterday.  I drafted the pattern and cut the pieces out yesterday, and sewed to this point today.  I need to run to the store for strap material before I can finish it.  It kind of looks like a diaper bag, but it's not.  Sorry about the awkwardness for the photo.  I only got to snap one picture  before my camera died.  LOL.

Sewing Class #11

I had my first advanced sewing class on Saturday morning.  It didn't feel very advanced.  I made a pillow.  It was a pretty simple project, but I got to practice button holes, so that was good.  I love the little multicolored buttons she had.

 Front

 Back

Cute Button Close Up

Saturday, April 9, 2011

Lazy Week

I feel like I didn't sew that much this week.  Part of it was because during sewing club (grades 3-6) I was helping a student make some pajamas and sewed through my middle finger.  I broke the needle into 3 pieces!  Nothing a little rubbing alcohol and a bandage couldn't fix.  But it did keep me away from the machine for a dew days.  Instead, I cut a bunch of stuff out while the finger started to heal.  I prep'd a bunch of drawstring bags as wrapping for gifts I am sending to my family.  Here is a picture of one of them.

 Katie's Bag

 I stared this little pouch last weekend.  I didn't get a chance to attach it to the frame until last night.  I made it for a silent auction we are having at school to raise money to help Japan.

Friday, April 8, 2011

Sewing Class #10

I finished the intermediate class today!  The last project was the precious little dress.  It was a lot easier than I thought it was going to be.  My friends need to start having some girls so I can make more of these.


Here is the project page for the advanced course.  I am starting the pillow tomorrow morning.

Here a picture of the bag that I have been DYING to make.  I have been waiting for months to learn how to make it.  I'll keep you all updated once I start it.

Tuesday, April 5, 2011

Drawstring Pouch Tutorial

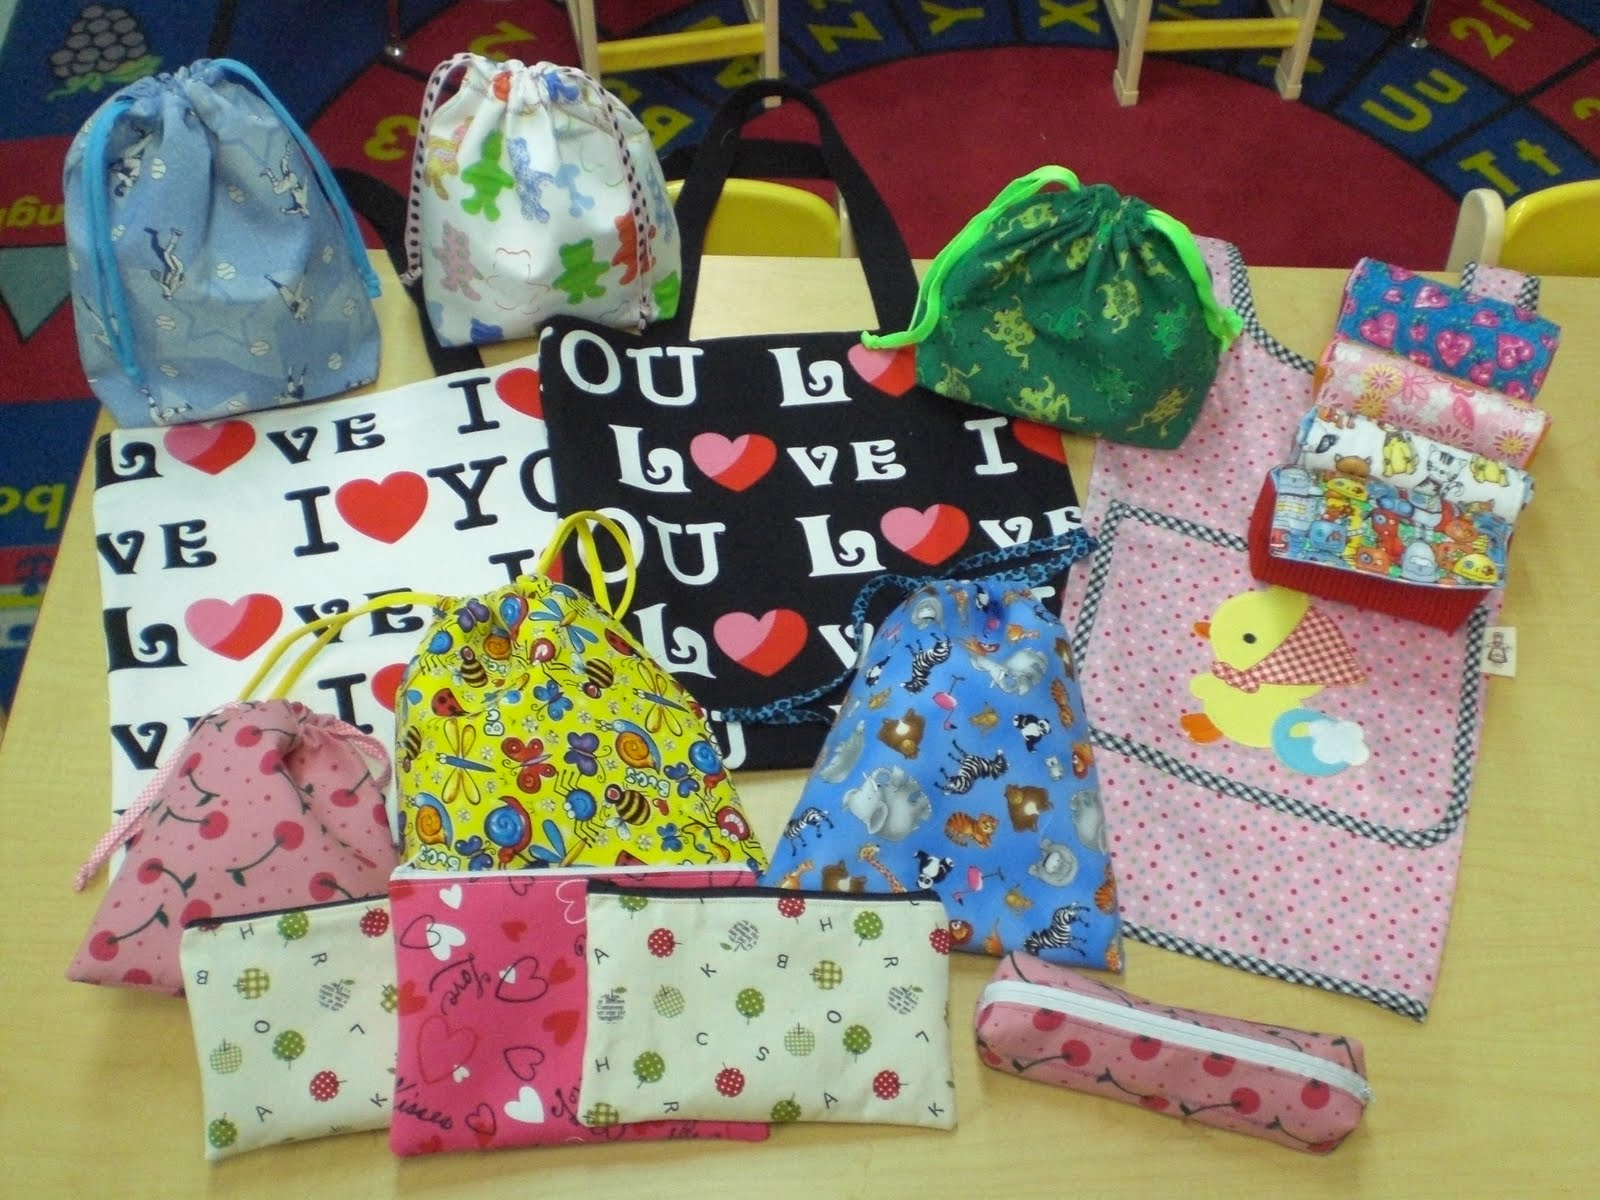
Living in Asia, they use drawstring pouches for numerous things.  I have found that I use them all the time now as well.  They are really easy to make and are great to give as gifts (or use as the wrapping).  Here is a tutorial on how I make my bags.


Start by measuring out your fabric.  You can make it pretty much any size you want.  For this tutorial, I cut the fabric 8x19.5 in.  If you have a serger (overlock), serge around all four sides of the fabric.

Use a marking pen or chalk to mark the short edges of your fabric.  Draw one line at 1/4 in. (creating line A), one line 1 in. from line A (creating line B), and the last line 1 in. from line B (creating line C).  Then, make tick marks 1 in. from each edge.

 When you're done marking, your fabric should look like this.  Repeat for the other short edge of the fabric.

 Fold and press the corners using the tick mark and line C.

 Fold and press line A.

 Fold and press the new top edge along line C.  Repeat for the other end.

Unfold the fabric.  Sew very close to the edge, where you folded in the corners.  (Sew along all 4 corners)

 Refold the fabric and pin.  Sew close the the edge of the fold.  Make sure you back stitch at the beginning and end of the seam.  Repeat for the other end.
 It should look like this when you are done.

 If you did not serge (overlock) around your fabric in the beginning, zigzag stitch along the two raw edges.

 Fold the bag in half.  Make sure you line up the TOP edges!  Place a few pins to keep everything in place.

 Sew along the edge, starting at the top.  Make sure you back stitch at the beginning and end of the seam.  Repeat for the other side.

 For crisp corners, trim the bottom two corners.  Turn the bag right side out.

 This is what it should look like.

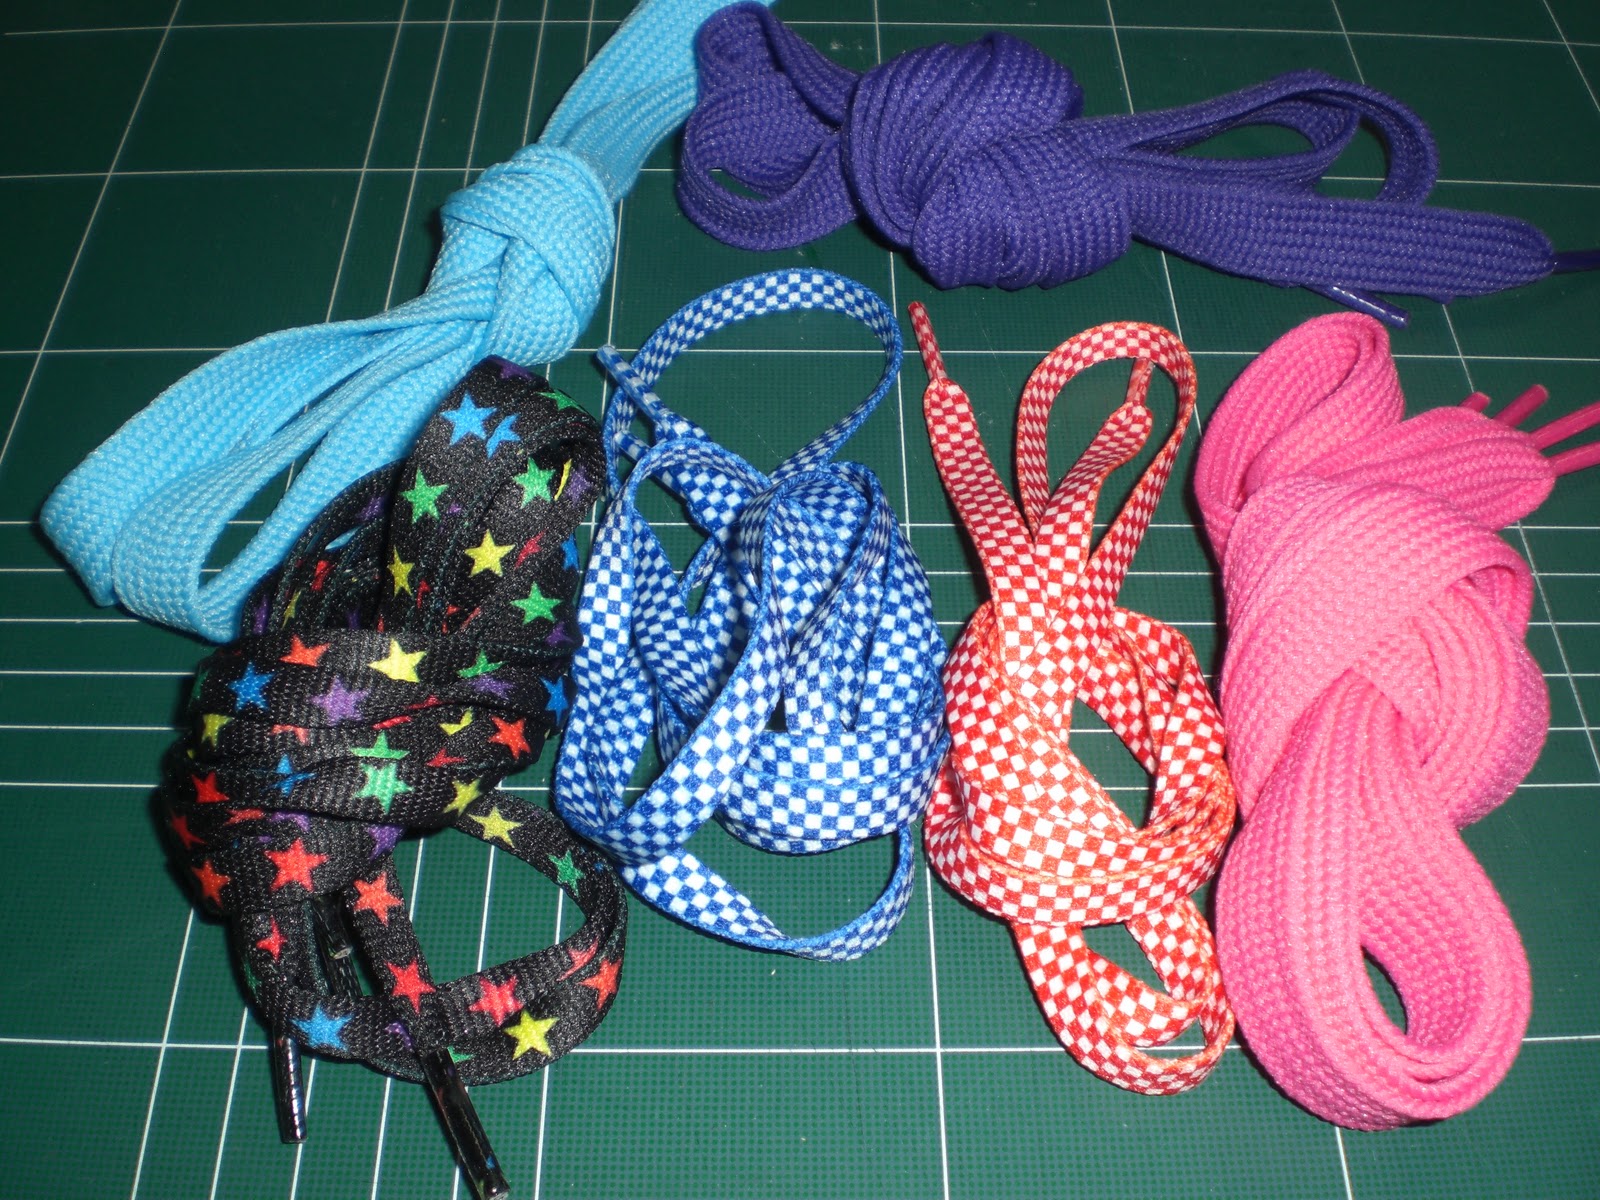
 Pick what you want to use for the drawstrings.  I use a variety of items from cording to ribbon.  I have also found some very fun shoelaces at the dollar store (pictured above).

 For this pouch, I chose cording that I found at the sewing store.  To figure out how long the cord should be, measure the width of your bag.  Use this formula: W+W+6= your cord.  So, my bag is 7.5 in wide (7.5+7.5+6=21) I'll need 2 cords that are 21 in. long.

 To thread the cording through the bag I use a bodkin.  But, you don't need a fancy tool for this.  I often use a safety pin if I have nothing else.  Shoelaces are pretty easy on their own.  Start on one side and thread the cord through both pockets.  For the next cord, start at the other side (going through both pockets of the bag).

 When you are done, it should look like this.

 You can knot the cord and stop here.  I added some beads to this bag to add a little pizzaz.

Taadaa!  All done.  Now, wasn't that easy!!